Add A Device
Step 1: Gather The Details
Before we get started, you'll need two things for every device on Helium, a DEVEUI and an APPKEY.
DEVEUI stands for DEVice Extended Unique Identifier, and it's part of what Helium uses to figure out where to send the packets it receives in the Helium Packet Router.
APPKEY stands for Application Key, and is the "secret handshake" part of the process that makes sure your data is not only identified (with the DEVEUI) but is also secure.
Want to Watch?
If watching a video is easier for you than reading, I've recorded one for ya. The video goes through onboarding a soil moisture sensor.
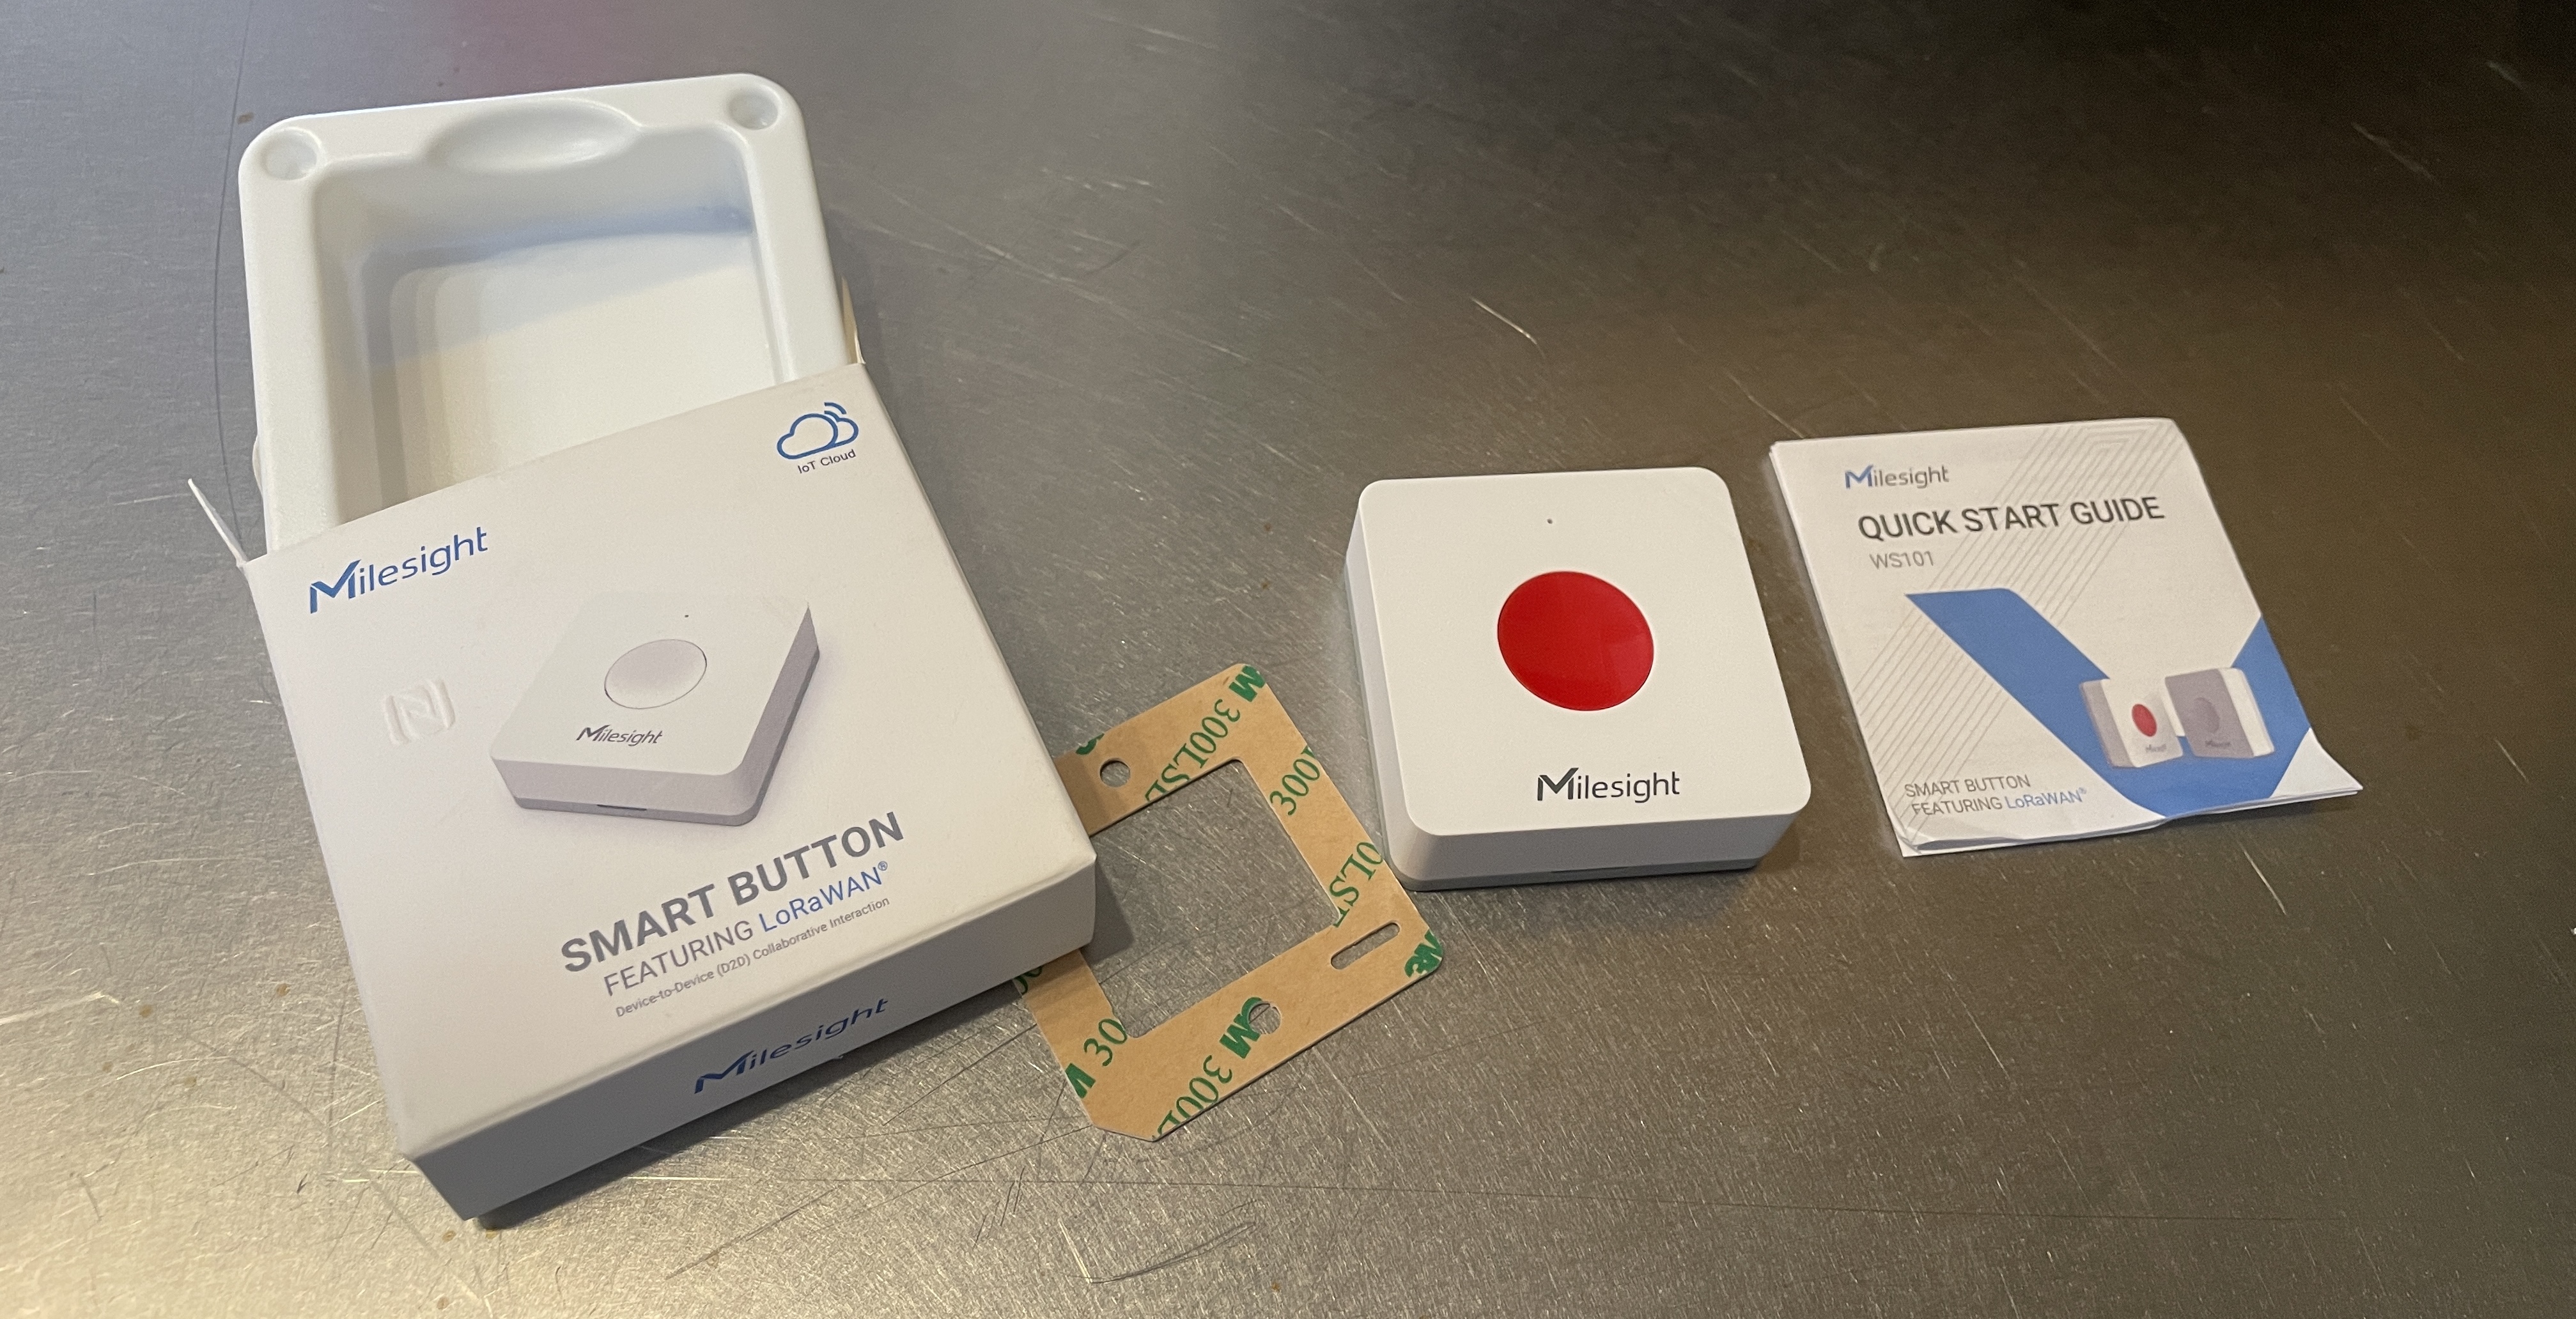
This written tutorial goes through onboarding a Milesight WS101 SOS Smart Button. I've found it useful to have different examples for the same thing when you're learning.
The Two Key Identifiers
When you get a sensor it will come with a bunch of long and complicated numbers:
- Dev ADDR (Device Address)
- DevEUI (Device EUI)
- AppEUI (Application EUI)
- AppKey (Application Key)
- AppSKey (Application Session Key))
- NetsKey (Network Session Key)
- SN (Serial Number)
Of those, you really only need 2:
- DevEUI
- AppKey
If, for whatever reason, you feel like you have to add in the AppEUI, you'll have to add in a custom field, which I'll show you how to do below. In other LNS versions (say, LORIOT or TTN) the AppEUi can be a critical aspect.
Different manufacturers provide these identifiers in different ways; Dragino usually prints them all on the inside cover of the box, RAK does the same. Some will provide a csv (especially if you're buying a ton of the same sensors.)
Milesight prints the DEVEUI on the box, then uses their iOS/Android app to give you the APPKEY.
Step 2: Add the Device to the ChirpStack Console
In the case of this Milesight WS101 SOS, we turn the device on by removing the battery insulating sheet, then we'll configure it via NFC. Some devices use BLE for configuration, some use USB. Check the manual that came with it (or run the ol' Googs search on it.)
Here's what the Milesight app looks like when we connect via NFC:
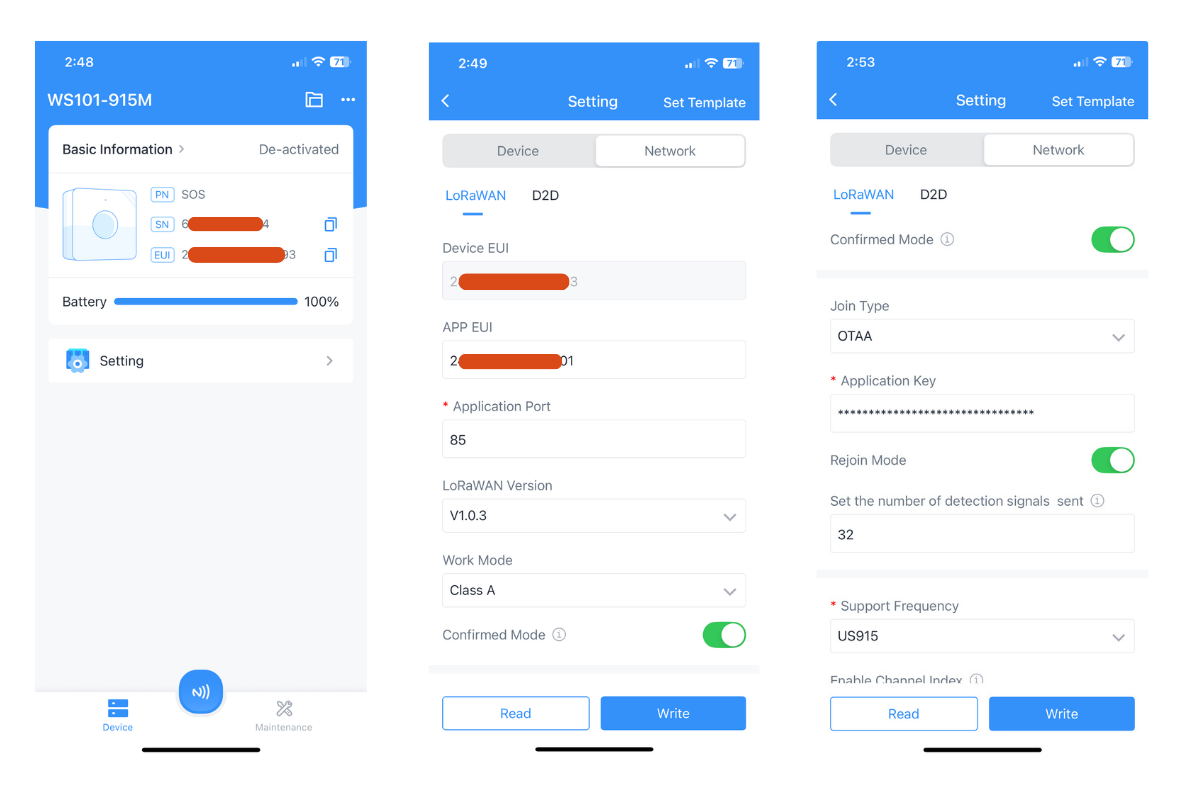
In this case, the Milesight app doesn't show the Application Key, so we'll create our own in Chirpstack, then assign our AppKey to the device.
This can vary device to device. If your device came with an AppKey, go ahead and use it, especially if this is your first onboarding a device.
With the device on and the DEVEUI and APPKEY ready, let's head to the MetSci Console!
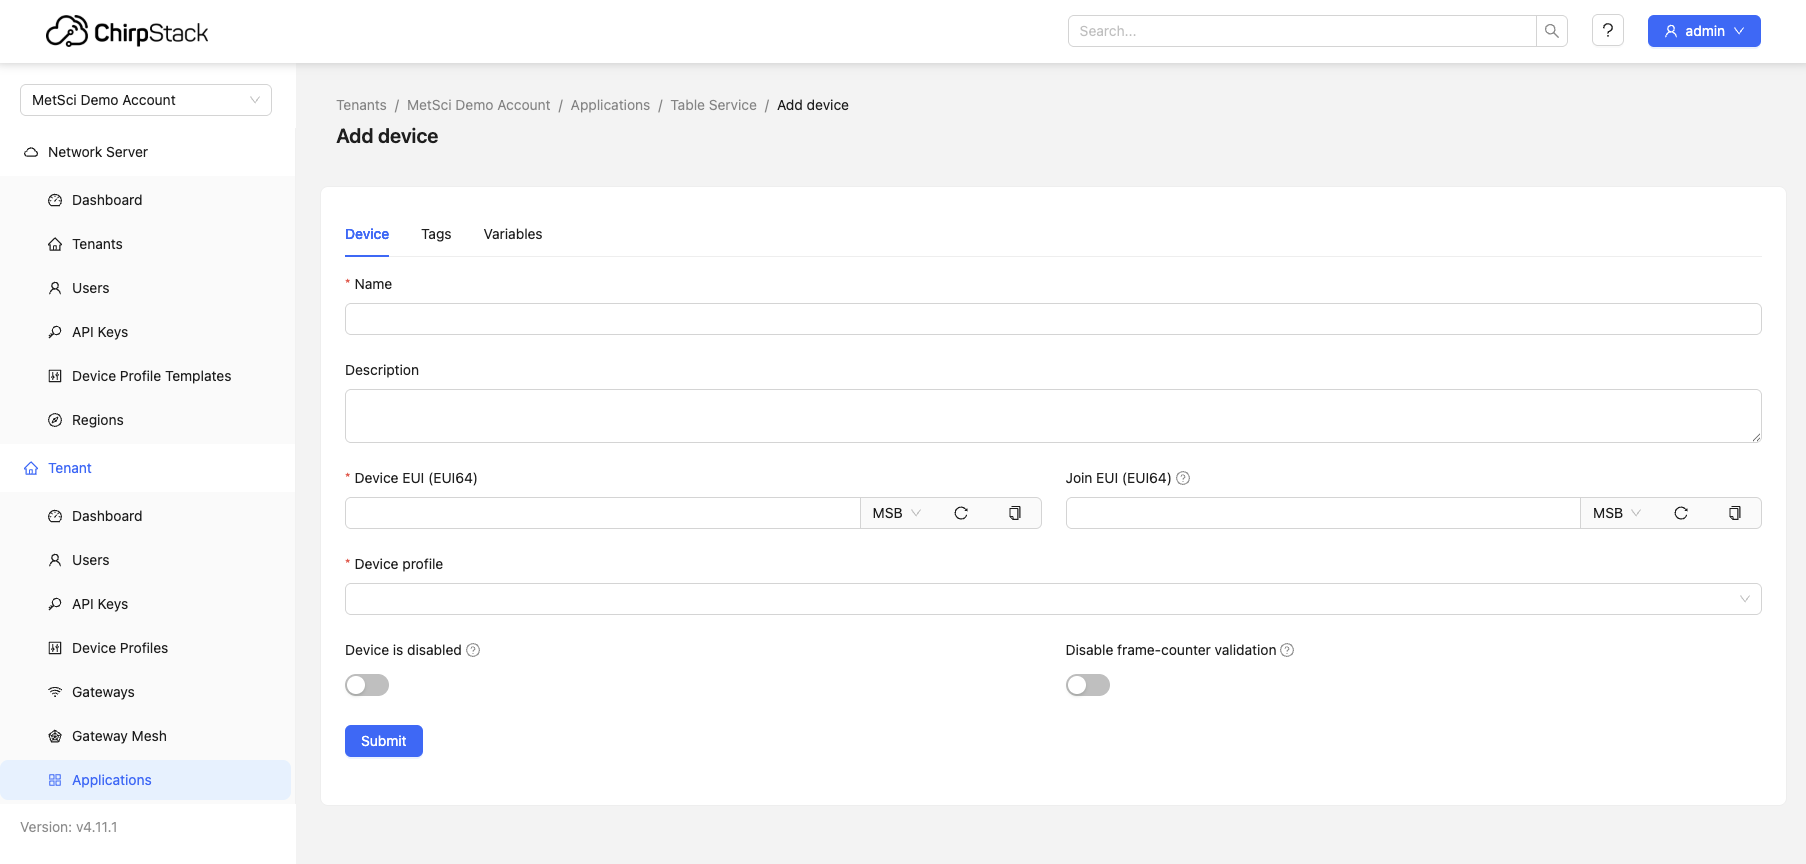
- Go to Applications:
- Navigate to your application (we've set this up in the previous tutorial.)
- Click on Add Device.
-
Naming Convention:
- Use a naming convention that makes sense to you. For example, you might use the name of the device and the last few digits of the DevEUI, or its position; whatever. Just be consistent.
-
Fill in Device Details:
- Enter any additional details that are important to you, such as a description or location. For this I'll use something like
Table Service button for table 1 at [redacted restaurant]. - For your first couple of devices, err on the side of more information, not less.
- Enter any additional details that are important to you, such as a description or location. For this I'll use something like
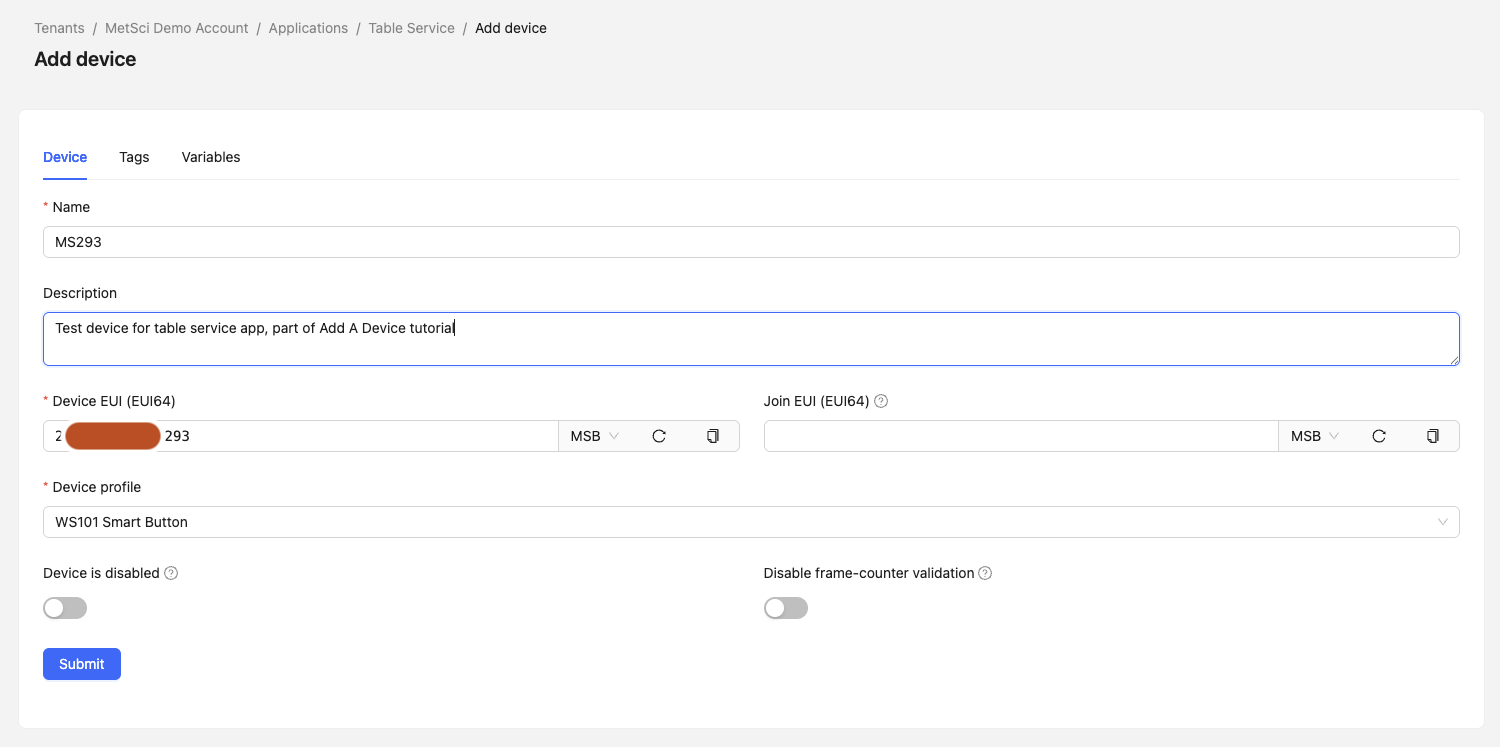
- Enter the DevEUI:
- Typically, you would copy and paste the DevEUI. Avoid manually typing it.
- Incorrect DevEUI/AppKey is the number one cause of LoRaWAN join frustration.
Most manufacturers will have a QR code with the device that'll give you the DevEUI so you can copy/paste from there.
- With some devices (like the soil moisture sensor in the video at the top of this tutorial) you generate your own DevEUI For most of them, the DevEUI is burned in when you get it.
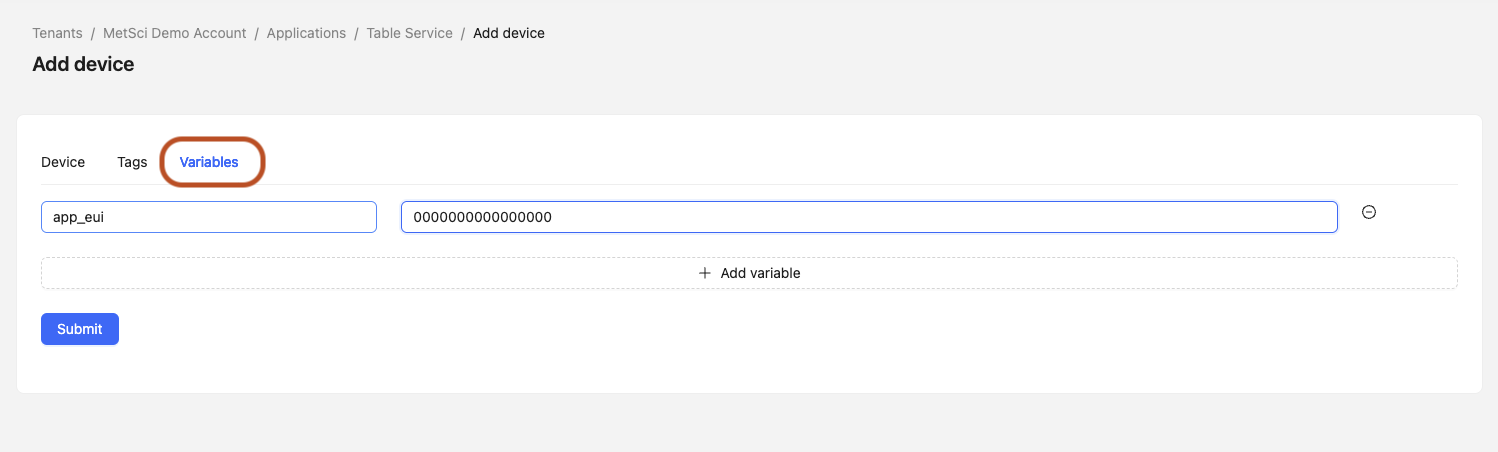
- Add the AppEUI
- Chirpstack doesn't need an
APPEUIbut I'll add one in that's all zeros so you see how to do it. Go to theVariabletab and add a new variable. - Use key
app_euiand the value of 16 zeros, like this:0000000000000000
- Chirpstack doesn't need an
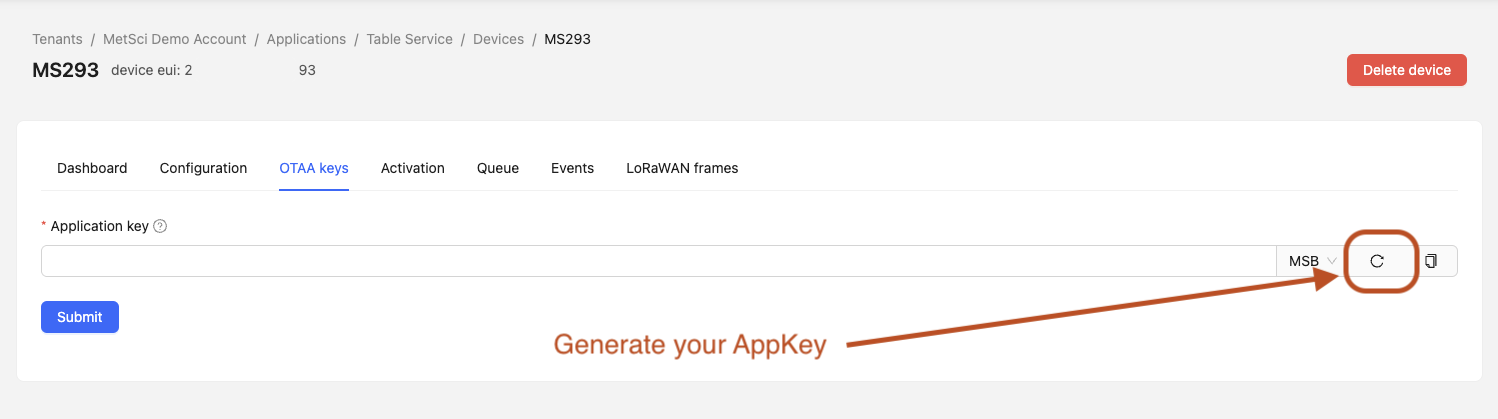
- Fill in or Generate AppKeys:
- Use the AppKey your device came with.
- If your device didn't come with them, or you lost the label, or if you're just paranoid and don't want the manufacturer to have your AppKey, ChirpStack allows you to generate these.
- Copy and store them in a safe place.
- Submit the Device:
- Once all details are filled in, submit the device.
- This is the point of anticipation/frustration, I know.
- Head over to the
LoRaWAN framestab to watch the Join.
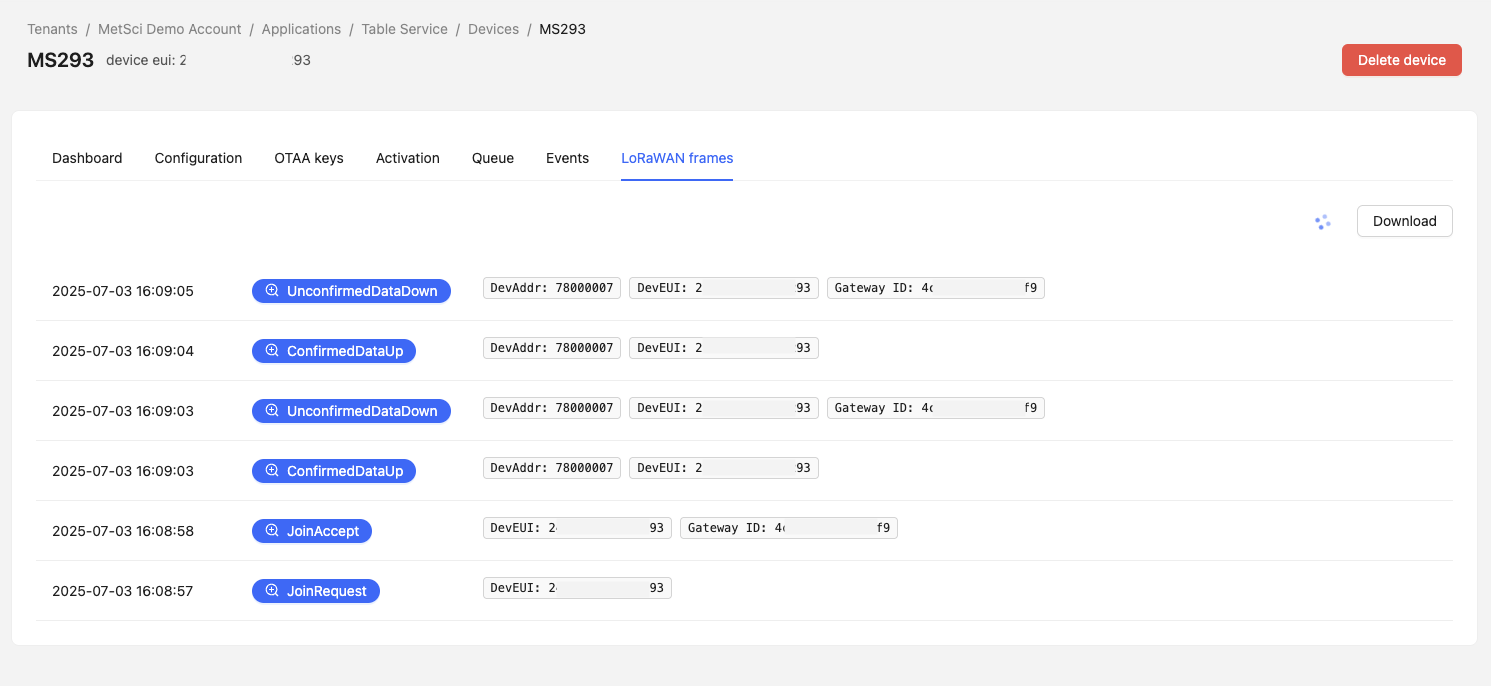
If you have Helium coverage where you are and don't see a frame come through, it is VERY likely you fat-fingered something. The most common support request I get is "My device isn't joining."
With one exception (lookin' at you Scott W), it has ALWAYS been one of those, "Oh, I forgot a zero in the APPEUI" or "It used the wrong AppKey", whatever that means.
While the MetSci console isn't AWS, it runs on the same platform as most other LNS in Helium and processes hundreds of thousands of packets.
I know you're special, but the most special thing about you right now if you're reading this and cursing is probably that you have fingers the size of German bratwurst, not that the LNS is broken. Just sayin'.
That's how you add a device to the MeteoScientific ChirpStack console. From here you can muck about with downlinks, dial in your decoder, grab network or application session IDs from the Activation tab and generally enjoy the geekery.

Rock 'n roll!
- Events: Contain information from the sensor (e.g., battery status).
- Frames: Include both the sensor events and additional information from the gateway.