Device Profiles
This is a lesson on how to use the device profiles part of the MeteoScientific ChirpStack Console.
Getting Started
If you haven't already signed up for a MetSci Console account, knock that out now. It's free to sign up, you get enough credits to test things out, and without an account none of the rest of this will make sense.
Want to Watch?
I get it, it's nice to have a video walk-through for this. If you'd rather watch than read, check it out here:
What is a Device Profile?
A device profile is a template for what a device is, can, and should do. Device Templates in Chirpstack make it easier for you to create groups of devices that all do similar things. These could be soil moisture sensors, parking sensors, traffic counters, or whatever devices you're working with.
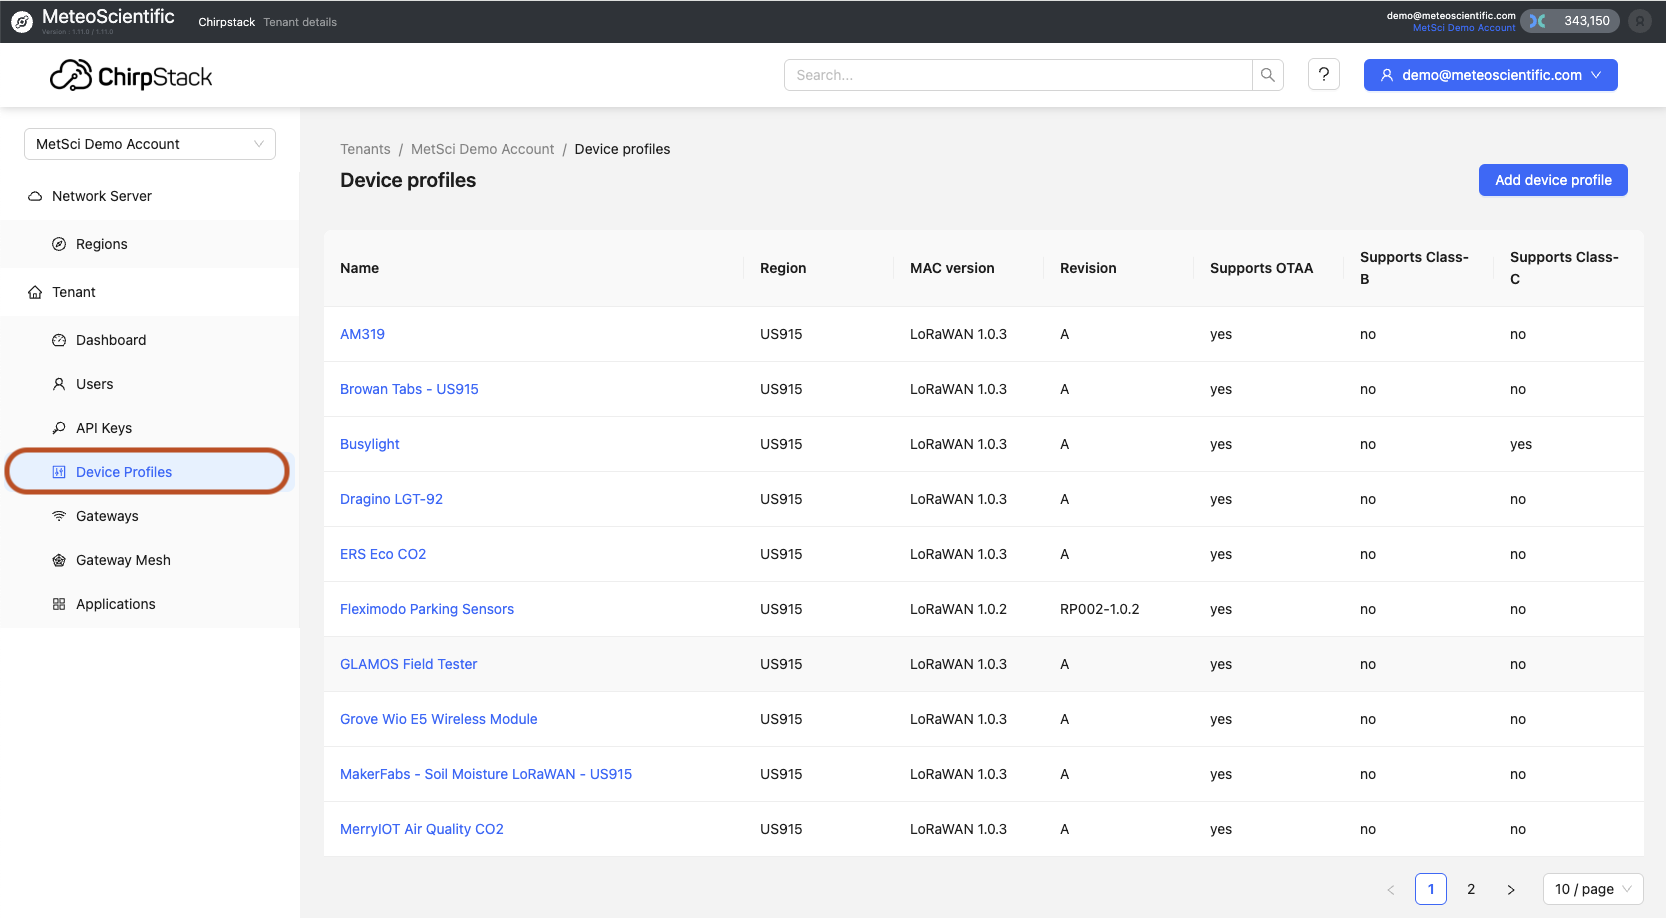
You can add or manage Device Profiles in your account from the Device Profiles section in the menu on the left.
Device Profiles are different than Applications, which would be a specific use of a Device or group of Devices.
For example, you might want to track the soil moisture in just one pot that has a small rosemary bush in it. If you're just doing one plant, in one pot, a Device Profile doesn't make sense.
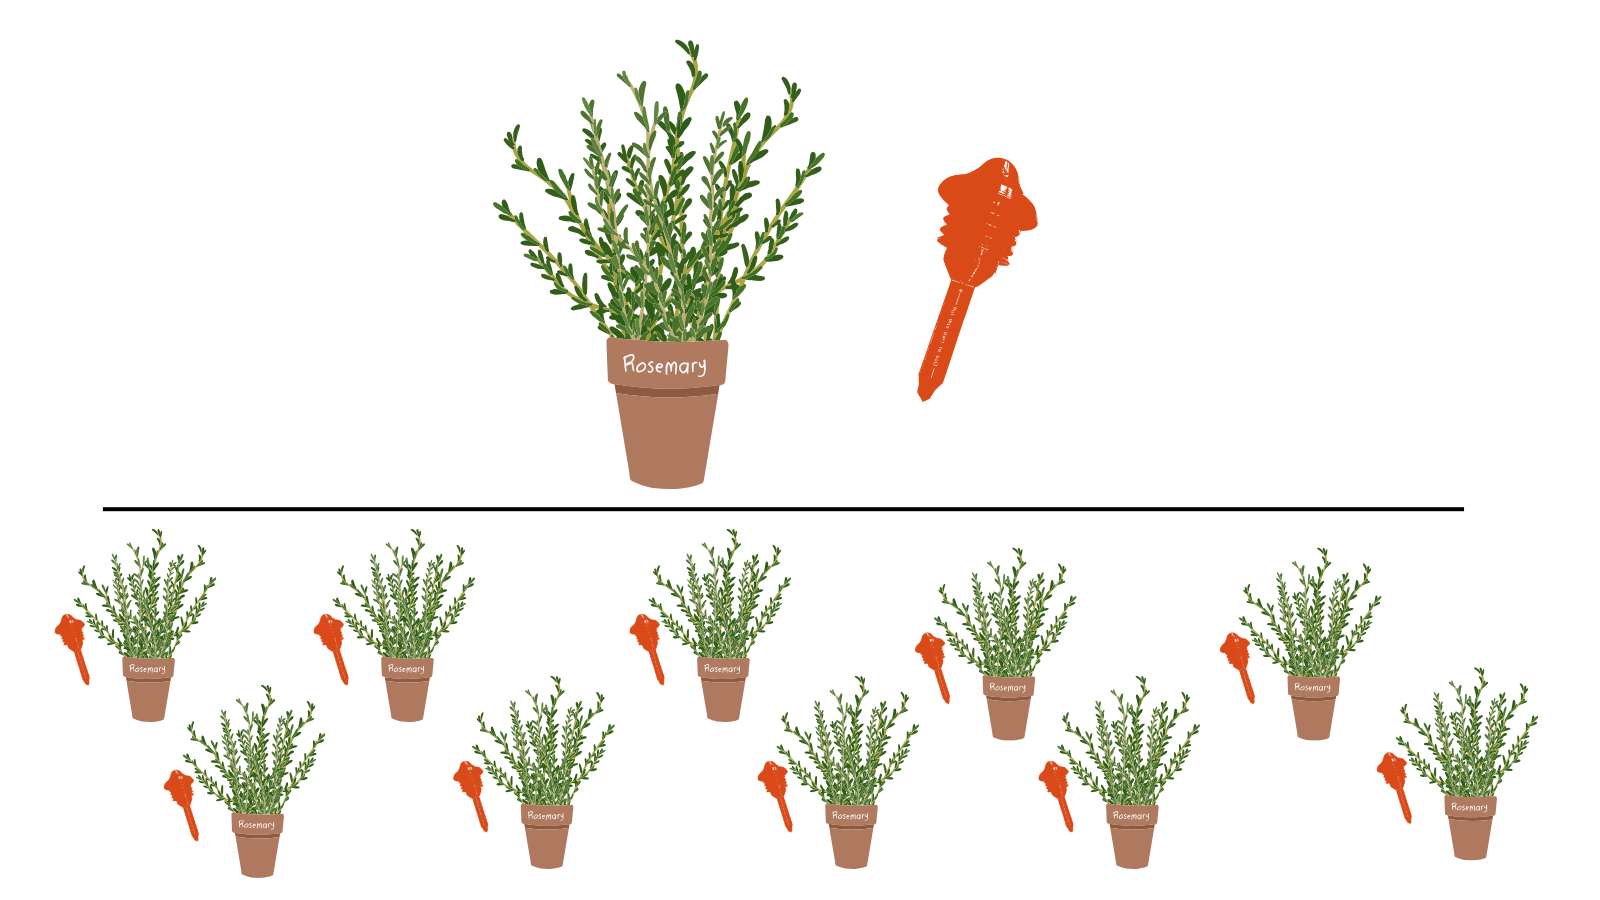
However, let's say you want to set up 10 rosemary bushes with 10 soil moisture sensors in 10 pots. Now it makes more sense to use a Device Template, because you're onboarding the same type of sensor ten times, and you shouldn't need to re-type the name, region, and uplink interval (along with a decoder) every time.
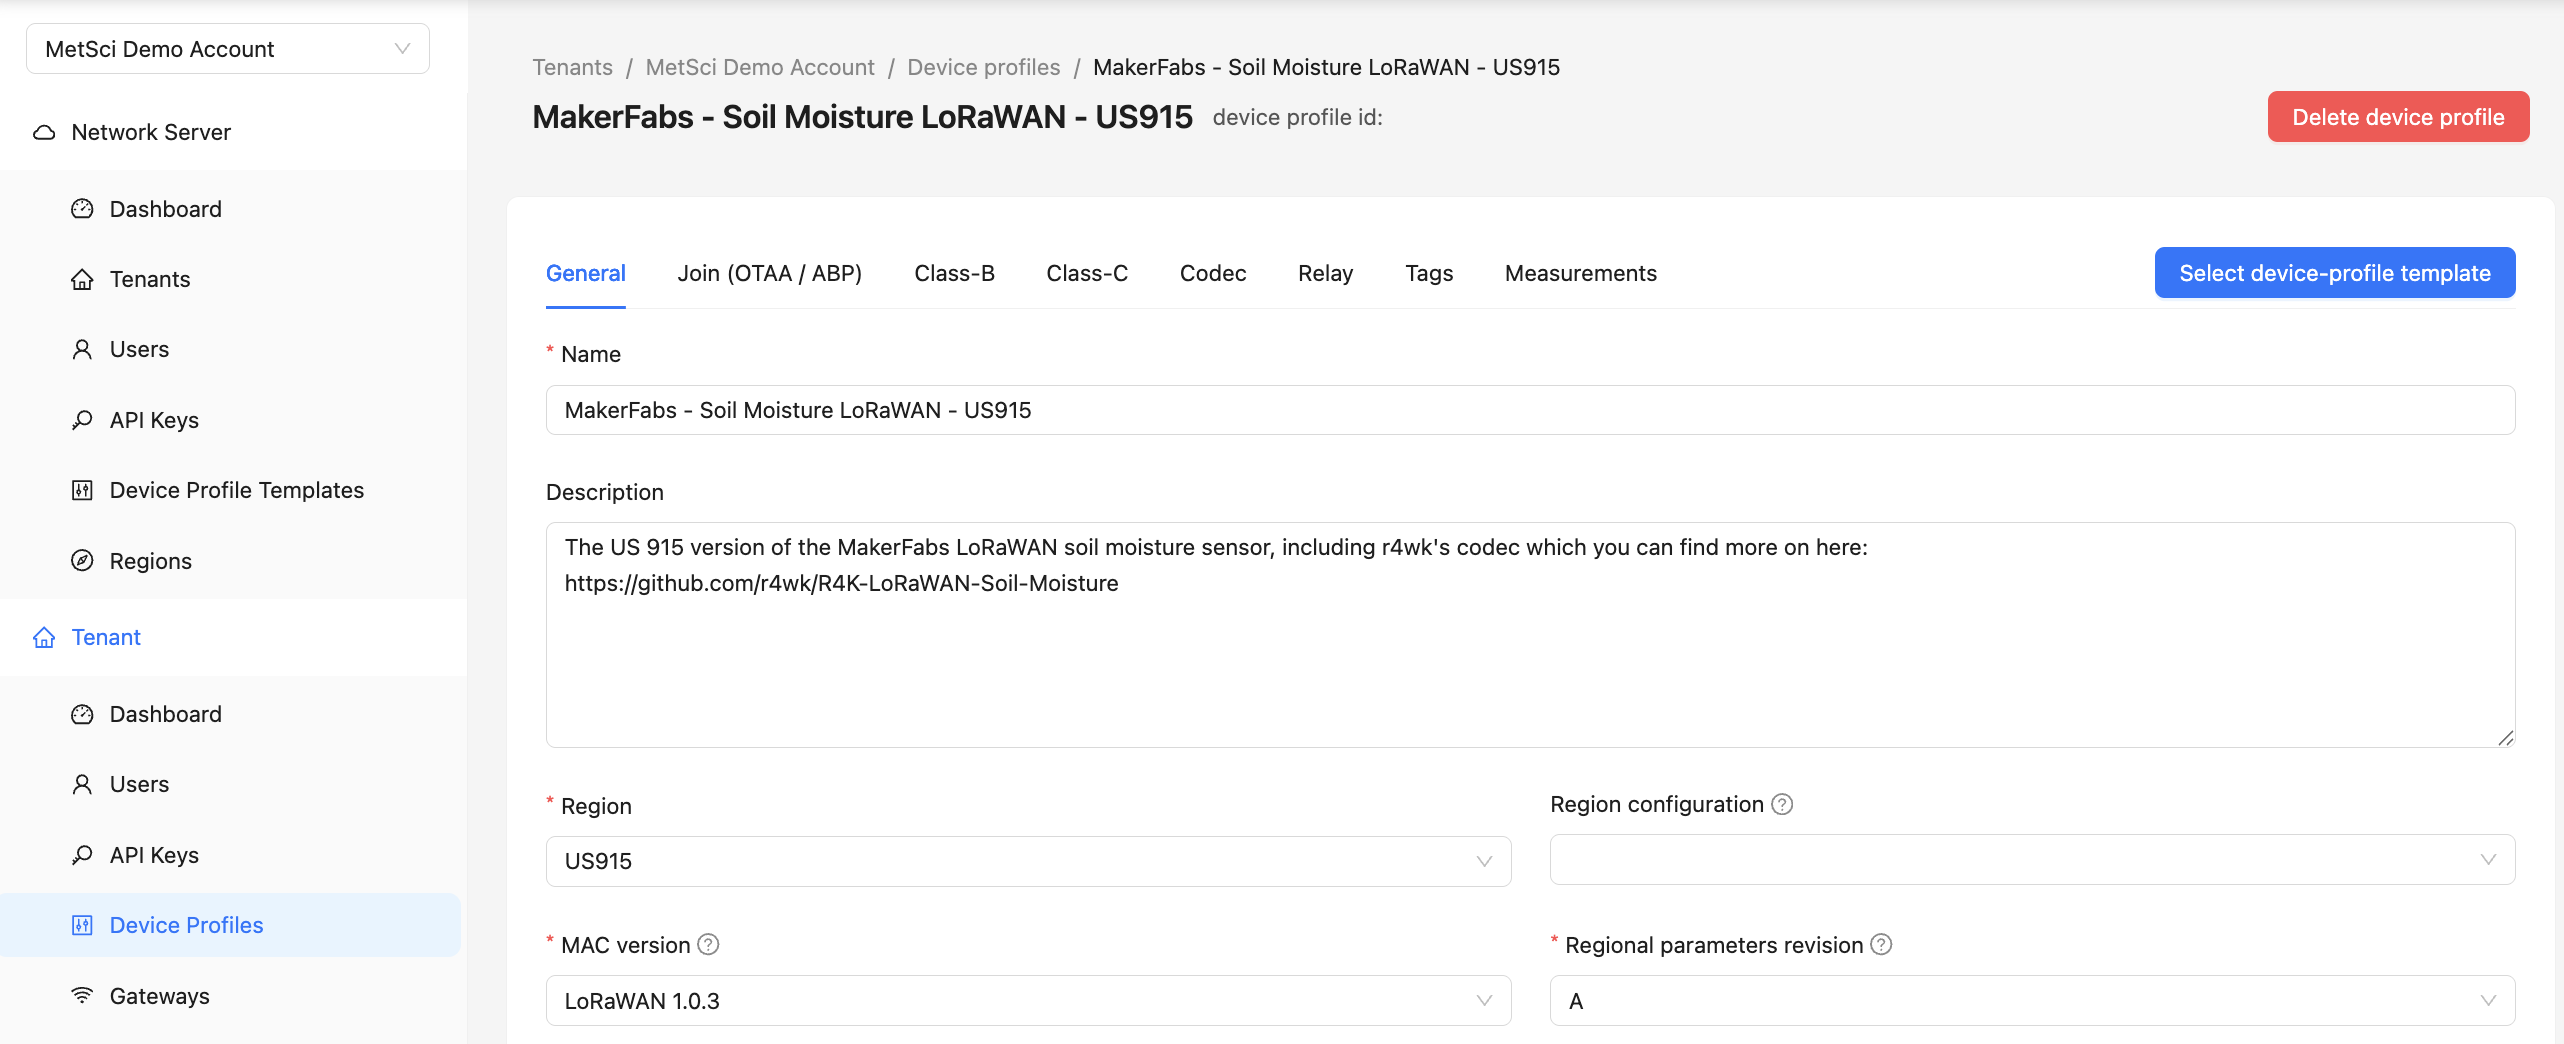
I've already set up a device profile so we can walk through it together. This is the MakerFabs - Soil Moisture LoRaWAN - US915 device profile.
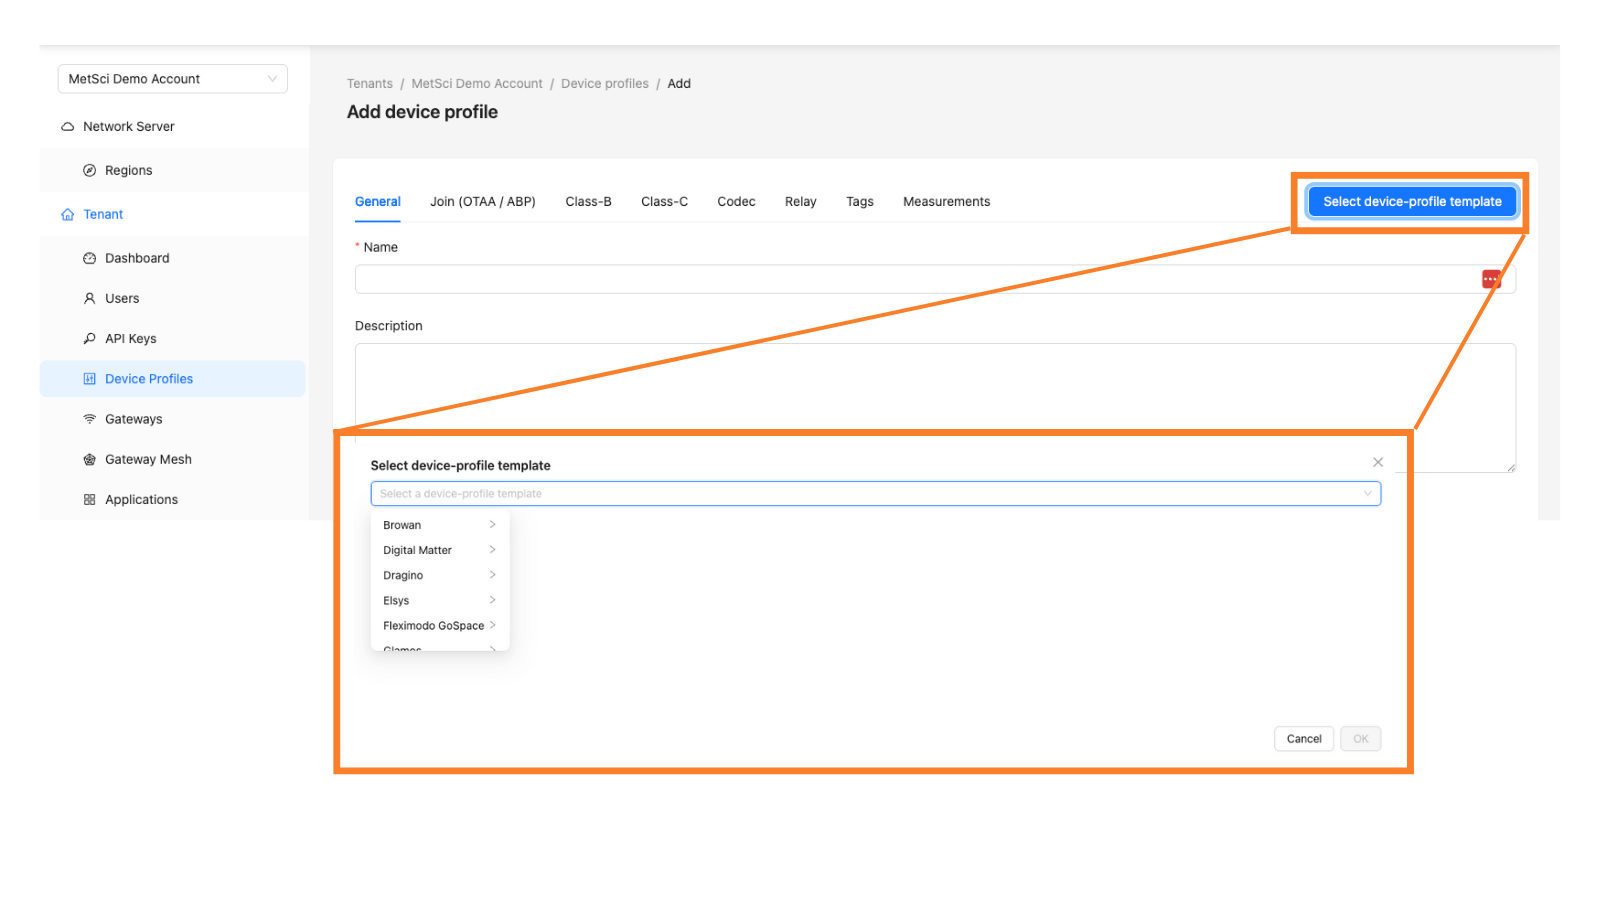
The MeteoScientific Console offers many device profile templates that are already set up for you. You can search through the available templates when you set up a Device Profile. Use the blue Select Device Profile Template in the top right section as you're setting up.
Naming Convention
Inside the profile, I've got the naming convention:
- Maker: MakerFabs
- Device: Soil Moisture LoRaWAN
- Region: US-915
MakerFabs has another LoRa (not LoRaWAN) sensor, which is why I used the full LoRaWAN name this time.
You can use whatever notes will be useful to you or other users in your account. Set your region to whatever region you're in.
I'm in the US-915 region here in sunny San Diego, California.
Default Settings
Almost all the other settings can be left alone. You can change them if you want, but for now, I'd recommend leaving them as they are.
The only other thing to change is the Expected Uplink Interval. I've got mine set to 3600 seconds, or once per hour.
What is an Uplink?
An uplink is the information coming from the sensor.
In LoRaWAN, we're always talking in terms of data in relation to the sensor. Uplinks go UP from the sensor. Downlinks come DOWN to the sensor.
An uplink is a packet sent from the sensor to the hotspot, which then forwards it to the LNS (LoRaWAN Network Server) and onto the console where it gets decoded.
The decoded data is then forwarded to an app or other integration (like a database), which can show you what's happening or send a notification "Hey, a pipe is leaking!" or trigger an action Airstrikes on leaking pipe.
If we wanted to send something back down to the sensor, that would be called a downlink.
Most devices are Class A devices, meaning they only occasionally send out an uplink, and only listen to hear if you have any instructions right after they've sent an uplink. It's part of what makes 'em low power.
They wake up on a timer, fire off a message, see if you've sent them a message , then go back to low power sleep. They don't listen all the time.
Other devices, called Class B and Class C devices, can be more active (and more power hungry). We'll cover them in another lesson.
Additional Settings
Join OTA
Join OTA (Over The Air) is a setting that should be left on. Class B and Class C devices will be discussed in a later video, but for now, just leave these settings as they are.
Codec
The codec is the decoder that translates the scrambled data packet into readable information, like temperature or humidity. Almost all devices will come with a codec provided by the manufacturer. You can find and use these codecs, or, if you're more technically inclined, you can customize them. ChatGPT has made writing codecs MUCH easier.
Tags
Tags allow you to categorize devices. For example, you might set up a location tag for "Quadrant 2A." This helps you organize and assign tags to devices within this template.
Measurements
In the ChirpStack console, you can configure the decoder to display the values you're seeing, like soil moisture percentage. This won't create graphs or send notifications, but it's a quick way to verify that your decoder and device are working properly.
Once you've configured everything to your liking, hit Submit to save the device profile.
Adding Device Profiles
Method 1: Using Templates
Let's say you want to add a MakerFab sensor just like mine. We've already put it in MeteoScientific for ya! Instead of manually entering all the details, you can select a Device Profile Template.
The MeteoScientific console includes a few templates, and more are being added. This means if we have a pre-built template, you can add it easily to Console without having to figure out the codec and other details.
Method 2: Manual Entry
If you need to manually add a device profile, you can do so by filling in all the necessary details. For example, if you're adding a Senzemo STO10 Stick, you would:
- Set the naming convention (e.g., Senzemo Temp Only STO10).
- Set the region (e.g., US-915).
- Set the uplink interval (e.g., 7200 seconds for a two-hour interval).
You can add notes, like a link to the device manual or information about where the device is located.
For the codec, you'll either paste in the manufacturer's codec or customize it as needed. Once everything is set, hit Submit to save the profile.
You're Done!
You've now learned what a device profile is, how it fits into the system, how it gets used, and two ways to add it — either by using a template or manually.
Ready to hit the Console?

Rock 'n roll!