How to Use the Helium Console
This lesson will walk you through the process of using the MeteoScientific (MetSci) Console. You can follow along by visiting console.meteoscientific.com and signing up for an account; you'll get 400 free data credits to start. This guide will give you an overview of the console and how data flows within the LoRaWAN network.
Want to Watch?
If you'd rather do this via video, check that out here:
Understanding Data Flow
Before diving into the console, let's break down the flow of data in the system:
- Sensors: It all starts with a sensor. For example, a sensor detects a leaky pipe and sends a coded packet through the airwaves.
- Gateway: The packet is received via radio by a gateway connected to the internet. Helium calls these "hotspots". The gateway forwards the packet to the MetSci console through the Internet.
- LoRaWAN Network Server: The packet passes through the LoRaWAN Network Server (LNS), which decodes the data.
- Console Decoding: The MetSci console interprets the decoded data, determining if a pipe is leaking, the current temperature, wind speed, etc.
- Applications: Finally, the decoded data is sent to an application or it can be integrated with other systems to trigger an action; say, if a door is opened a light gets turned on.
Today, we'll be focusing on the MetSci Console.
Getting Started with the MetSci Console
- Sign In: Head over to console.meteoscientific.com and sign up for an account.
- Dashboard Overview: After signing in, you'll land on the dashboard, where you'll see four cards:
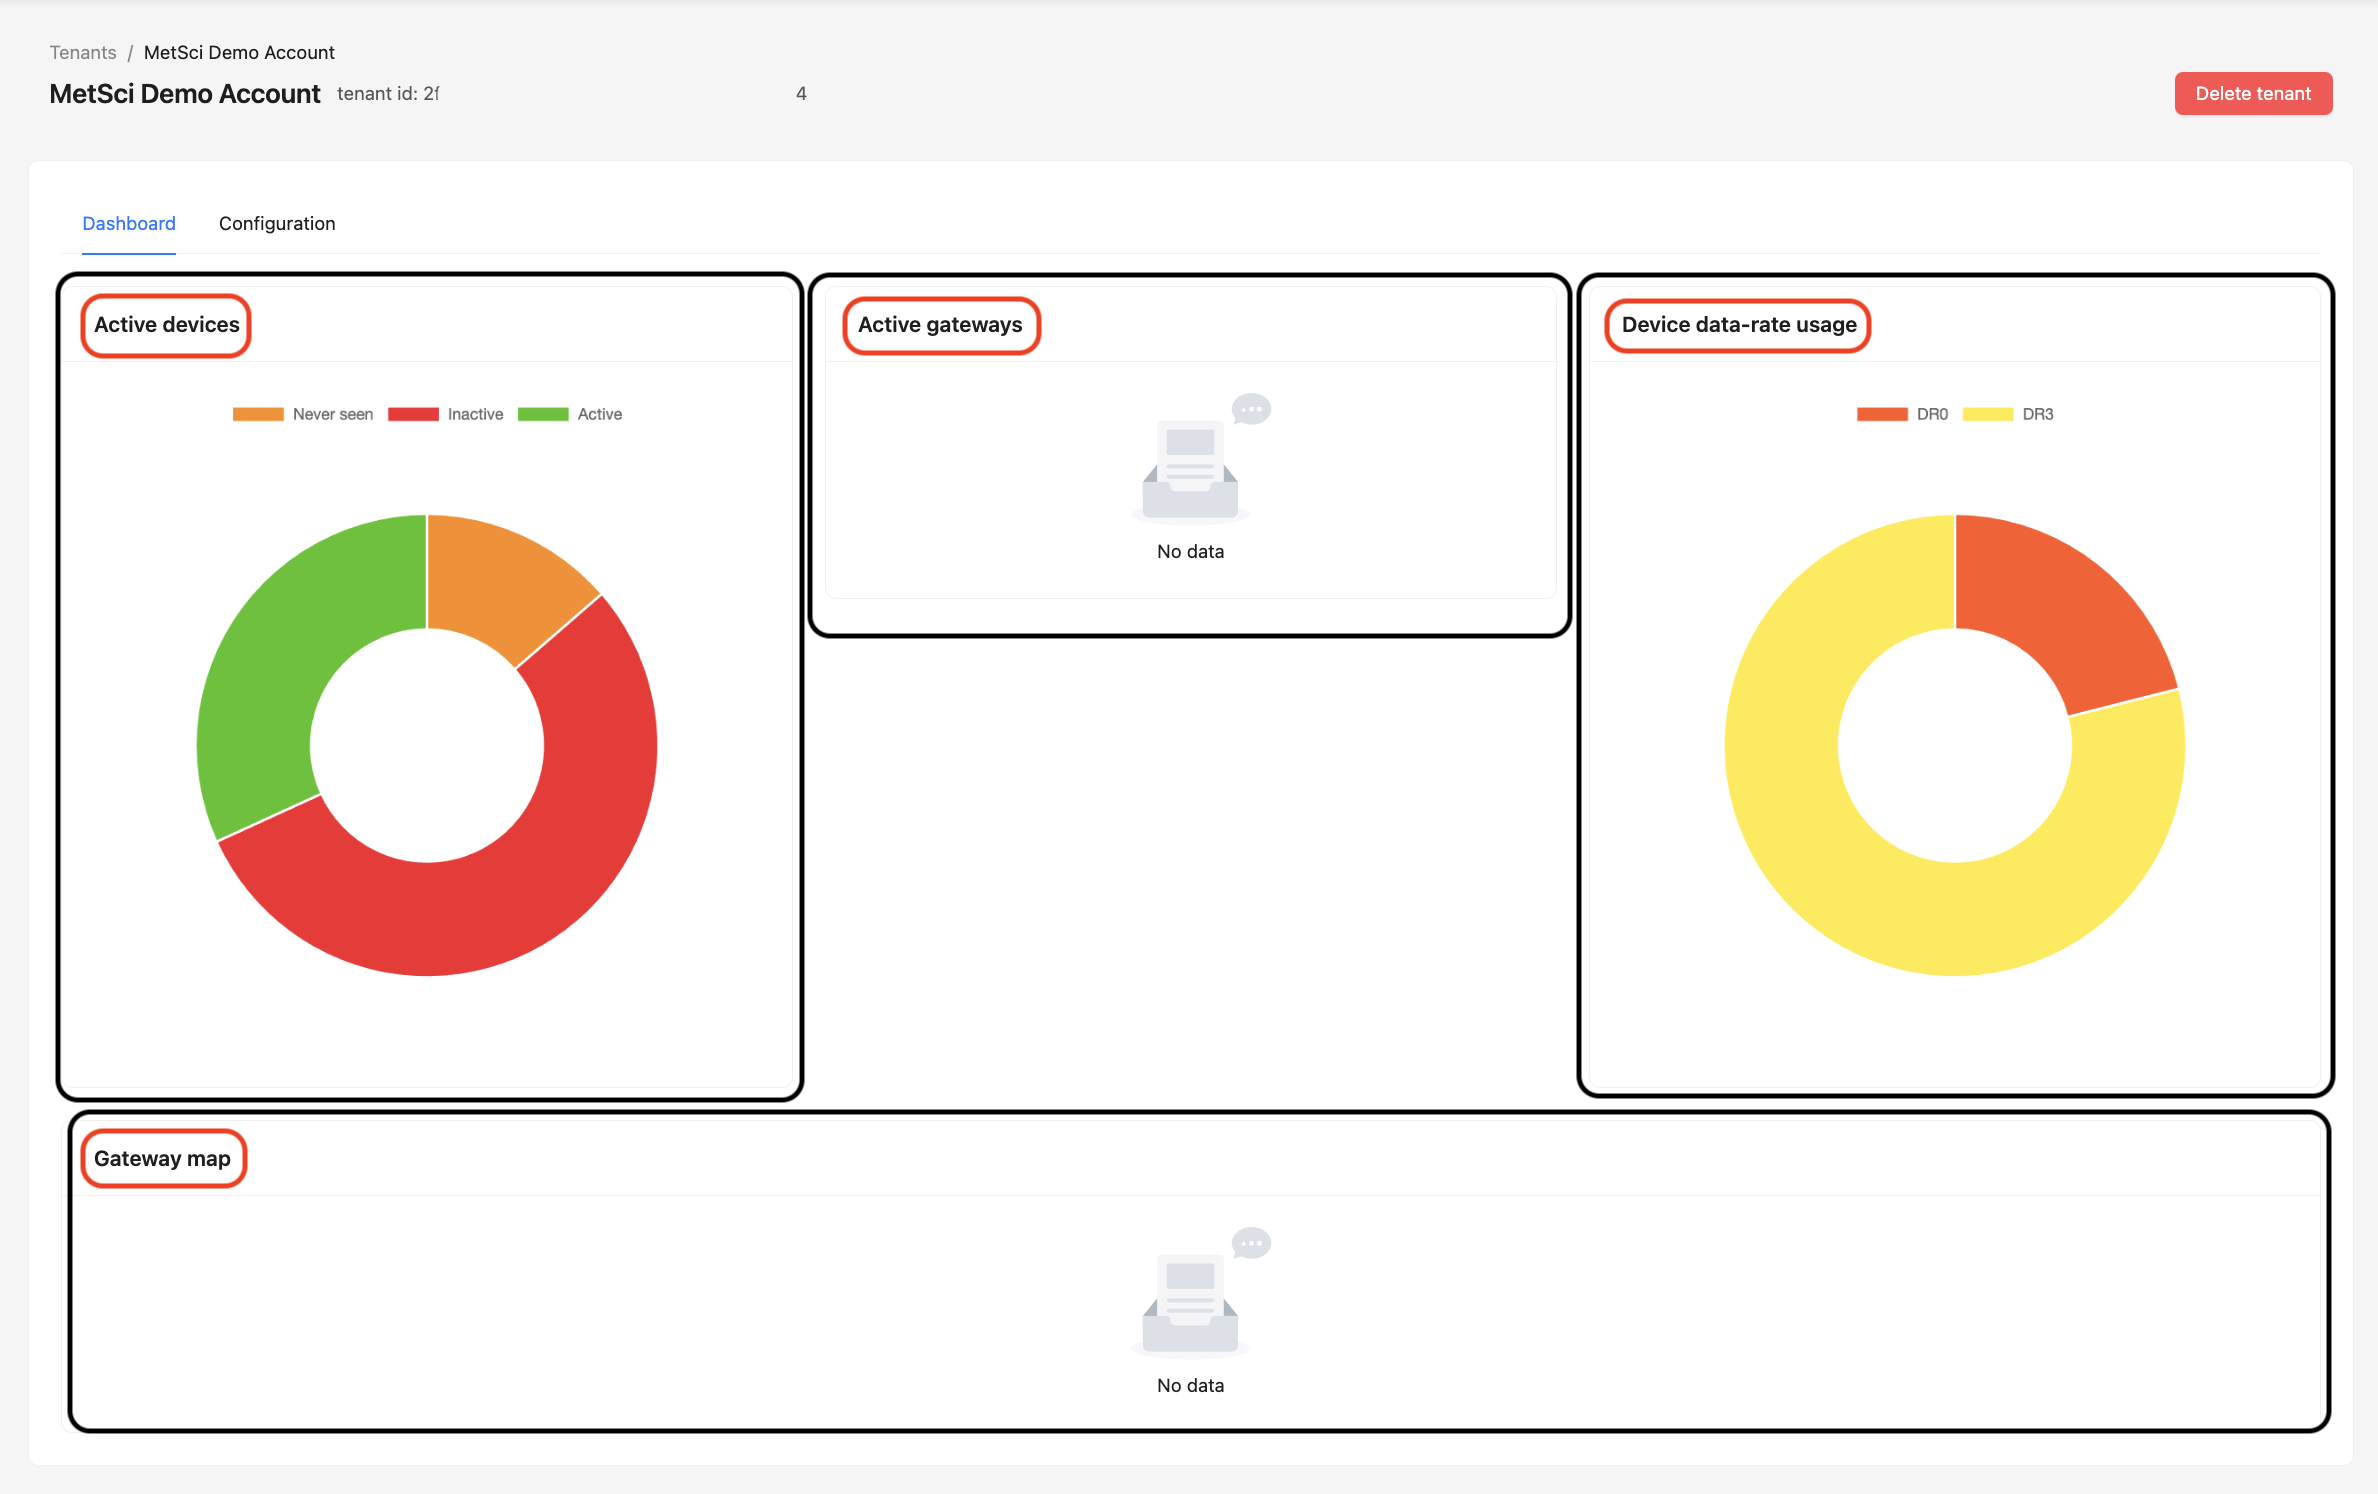
- Active Devices: This is the most important card. Here, you can view devices you've set up.
- Active Gateways: You can safely ignore this for now; all Helium's gateways are your active gateways.
- Device Data Rate Usage: This is more technical, and we'll cover it in a separate video.
- Gateway Map: This doesn't show in Console. You'll need to use the Helium Explorer to view all gateways.
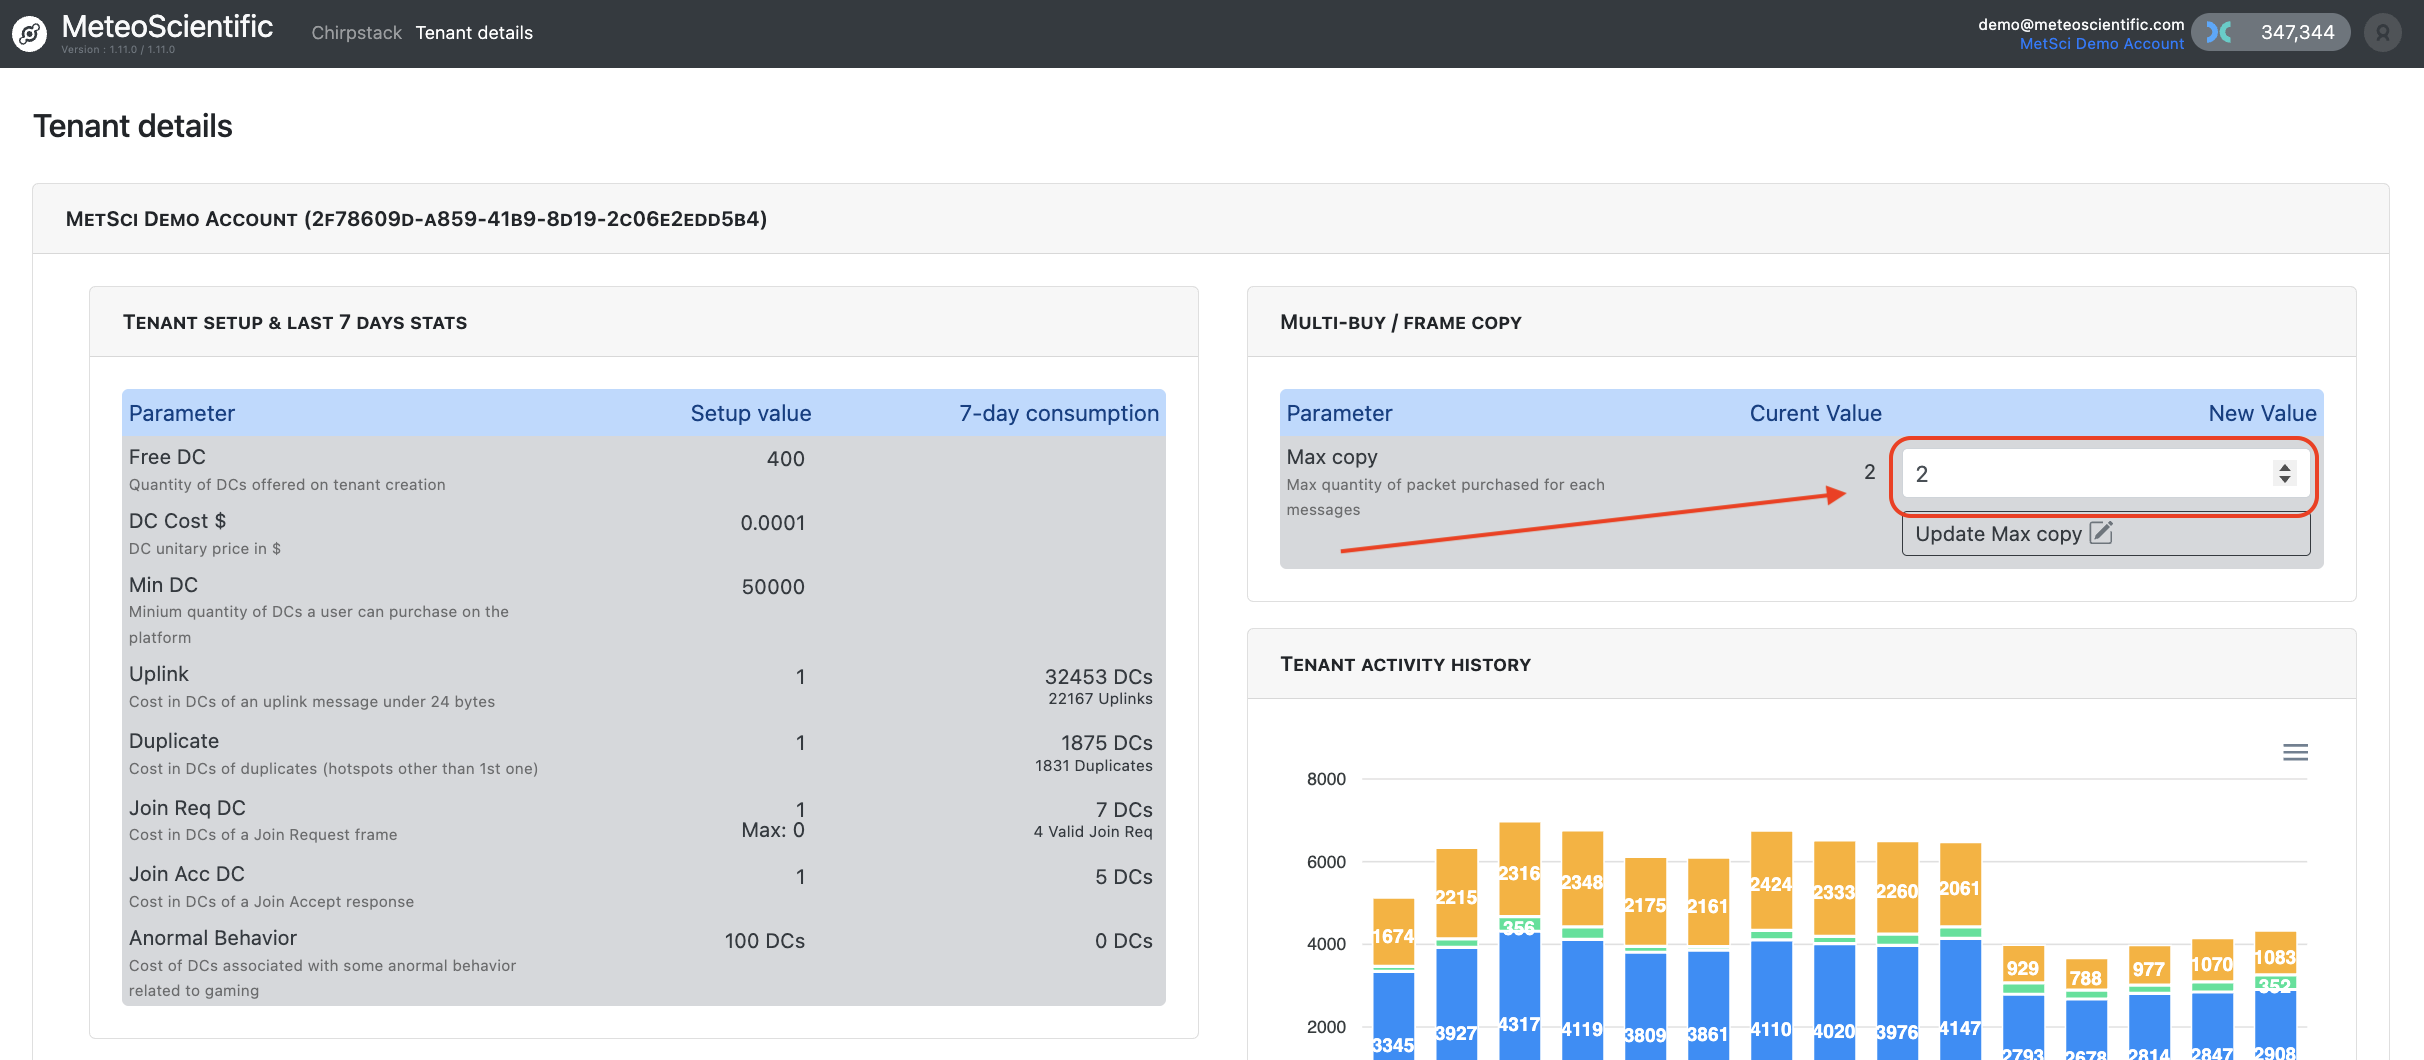
Tenant Details
Every console account starts with 400 free data credits. Here are a few things to know about data credits:
- Cost of Data Credits: Each data credit (DC) costs $0.0001. The minimum purchase amount is 50,000 DC, which costs $5.
- 1 Data Credit = 24 bytes: If you're sending a 25 byte packet, it will cost 2 DC.
- Usage: A device sending a 1 DC (24 byte) packet every hour for a year will cost 8,760 DC, or $0.876.
- Managing Duplicates: If you want redundancy, you can get duplicate packets from multiple hotspots. You can do this on a device level or across your tenancy. To set it across your tenancy, choose
Tenant Detailsat the top of the page, then look for
Adding Users and API Keys
The console allows you to add Users, such as a business partner or admin, by navigating to Users and entering their email information.
Additionally, you can generate API Keys to connect your console to other software systems. We'll cover that more in depth later.
Device Profiles and Applications
One key area where new users get tripped up is understanding Device Profiles and Applications.
Here's a quick breakdown:
- Device Profiles: Think of this as an application template. It holds settings that apply to a group of devices.
- Applications: An application is a collection of devices, such as parking sensors or trash can level sensors.
- Tags: You can use tags to organize devices, such as grouping parking sensors by levels in a parking structure.
Additional Features
- Purchase Data Credits: You can purchase additional data credits directly through the console.
- Service Requests: If you encounter any issues, you can submit a service request here, although it's far more helpful to the public if you submit over on the Github Issues page.
- Migrating from Legacy: If you're transitioning from the original Helium Console (almost no one is as of January 2025), there's an option to migrate your data.
- User Profile: You can update your profile details at any time, including your name, address, and company info.
Hit The Console
That wraps up this overview of the MetSci Console! We'll dive deeper into specific features in the following lessons. If you haven't signed up for a console account yet, head over to console.meteoscientific.com, sign up, and poke around.
